Sunday, January 8, 2012

Schools Auction

I spent most of this weekend making things for our school's auction-like I need an excuse to craft.  I found a pink gingham memo board at my local thrift store.  It was really cute, but I decided to recover it for a more sophisticated look.  To keep it young, I added some yellow accent flowers.  They are easy to remove if someone would prefer it without the punch of yellow which I happen to adore.

I also found some plain photo boxes and jazzed them up with ribbon and the yellow flowers.  The good news, again, is the flowers are also easily removable from the photo boxes.  They are attached with Zots, and only attached to the metal label holder.

These Scrabble Tile Frames were super easy to make, if you don't consider that I unintentionally burned my fingerprints off with all the dag um hot glue.  Ouch!!!  These frames did not come with glass, so I think it would be nice to use double sided tape to attach pictures to the card stock matting.

Finally, I bought the 3 little photo/memo holders for just a few bucks at my local craft store.  I hope it auctions for big bucks!

CLICK ON PIX FOR A BETTER LOOK :) 
I decided to add some close ups! :)


1.
Pin It

Monday, January 2, 2012

Photo Boards


I finally put some photos on a photo board I purchased from a thrift store for $1.99.  It looked so good, I decided I wanted a couple more.  I searched the thrift stores with no luck, so I thought, "What the hay!  I like it so much I will buy a couple brand new from Target or Bed, Bath and Beyond."  Well these things are much more expensive brand new.  $25.00 to be exact.  I decided to just make them.  I figure it couldn't be that hard, and.......I was right.  I made two in less than 2 hours.  Luckily I had most of the supplies on hand.  I did have to buy the boards from Lowes.  They were less than five dollars each. 
I had spray adhesive, an old yoga mat, button blanks, fabric, ribbon and batting on hand in my craft closet.  This is a bit of a backwards tutorial or picture diary.  Work your way up from the end of this blog post to get an idea of the process.
Here are the finished products. I just need to add photos.

They are larger than the inspiration board, but I like them just as much.

Yay, here they are. 

The glue works :)


Super glue the button on to cover the staples.

Covered button blanks.

Cutting the fabric to cover the buttons.

Before the tufting staples.

All ribbons are in place.

Second ribbon in place.

The first ribbon just cuts from corner to corner.  Easy Peasy!
Just staple the ribbons on to the back of the board.

I used an old yoga mat and batting to give a little cushion to the boards.  Spay adhesive helps keep them in place.

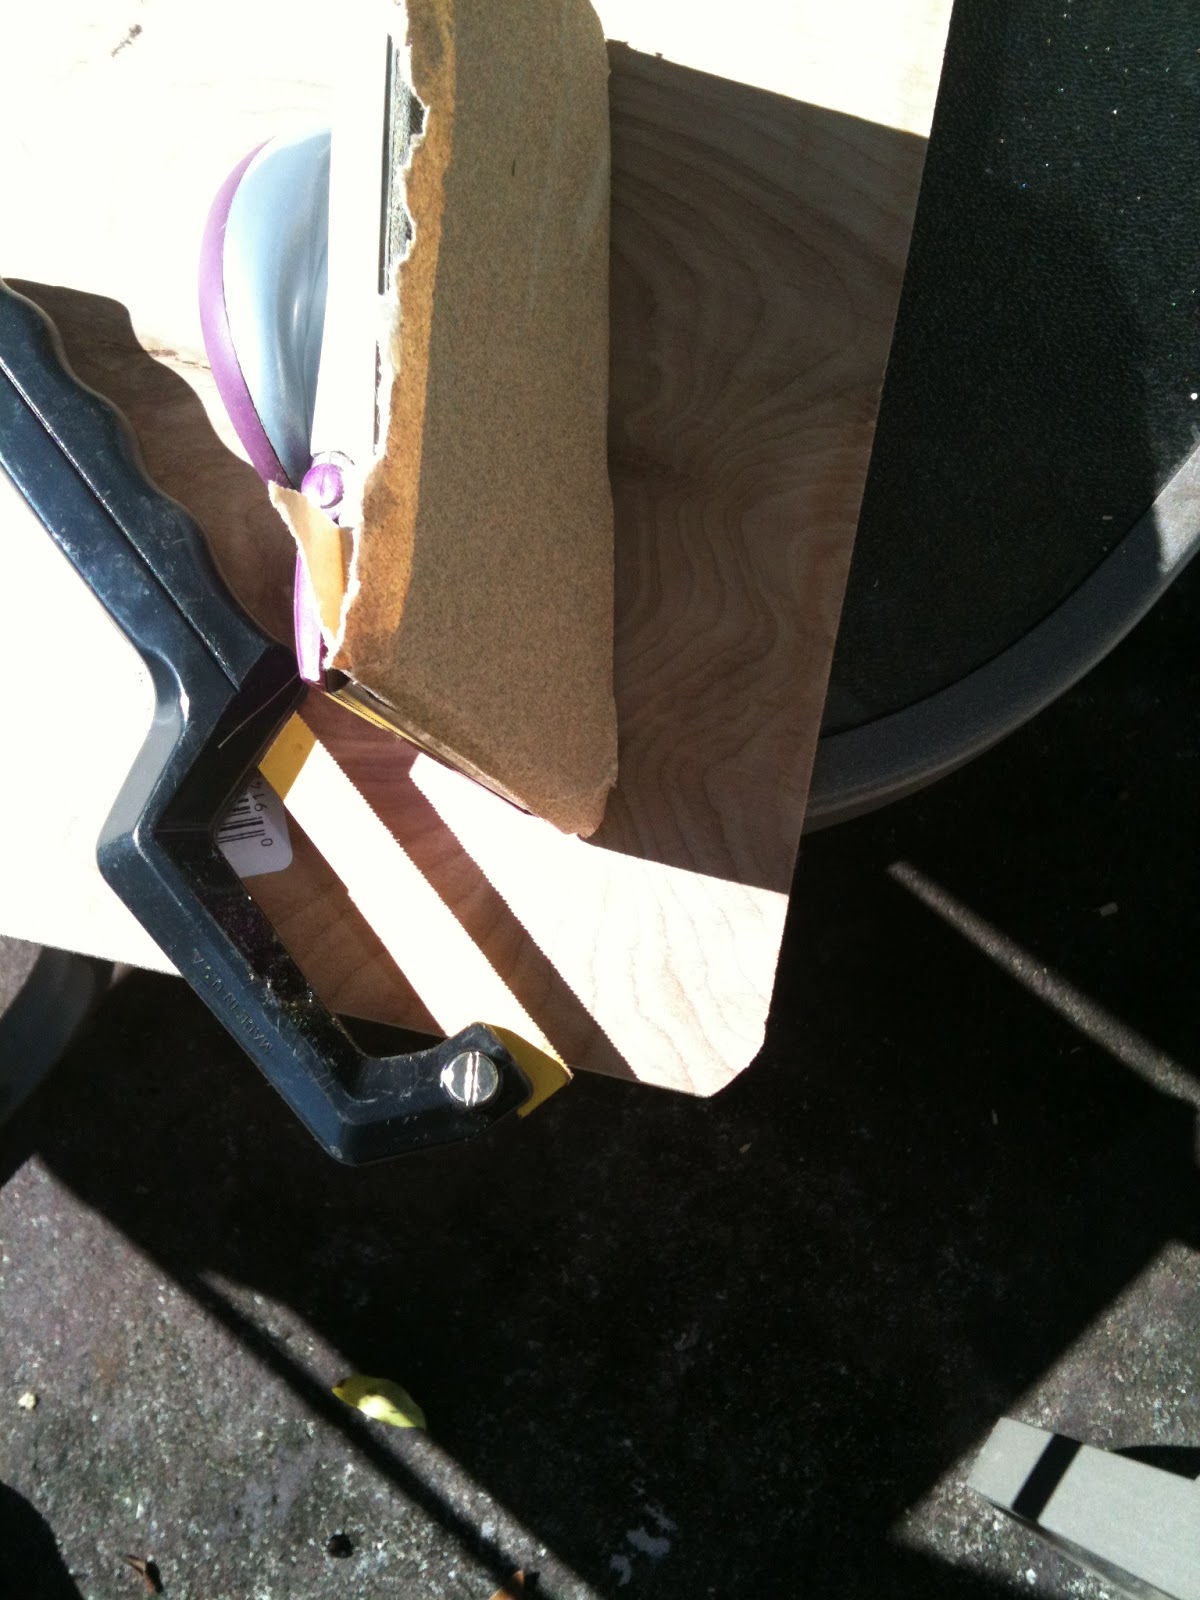
Sand the cut corners.

Cut the pointed corners with a small hand saw.  This was much easier than I thought it would be.

This project required thin, light weight plywood boards, scissors, fabric, ribbons, button blanks, a staple gun, small hand saw, spray adhesive, and old yoga mat.

Button blanks purchased at a thrift store over a year ago for very cheap.

I had planned on making three boards, but the yoga mat provided only enough material for two.


Saturday, August 13, 2011

Redecorated Dining Room

This beautiful dining room inspiration picture came form Better Homes and Gardens online.  I fell in love with it and thought I'd give it a try.  I worked on it in between NASCAR race trips, vacations and work training/seminars this summer.  I did a little bit of sewing and a lot of shopping at my favorite kinds of places-thrift & antique stores. 

Our room is now about 85% complete and still a work in progress.  I decided to share the pictures now, because I just broke ANOTHER camera.  This one was less than a week old. (I really need to start using the little wristlet that comes as a saftly feature.) 

 The list of things we need to do:  Dustin and I still need to create or purchase some artwork - I need to sew one last slipcover - We need to add sconces near the buffet for better lighting - Another rug needs to be added in front of the buffet. 
The biggest challage is the paint color.  We are still debating the color for the walls.  I bought several quart samples of greys, but I'm scare to even put those on the walls. 
Okay so maybe not 85% complete, but more that 50% surly?!

These picture don't quit look like the one above, but it's getting there.  This room looks much nicer in person than it does it picuters......not only do I break cameras, but I'm not very good at using them either. 


The material for the slipcovers are from sheets I purchased at local thrift stores.  The flowers are so bright and cheery :)

The Dairy glass on the middle of the table came from inside the walls of our kitchen.  When we renovated the kitchen in 2006, Dustin found it sitting inside the wall covered by 70 years of plaster.  I'm glad we can display it. 

The floral picture and mirror need to be hung on the walls, but with school starting back who has time?

The curtains are actually table cloths hung using those little rings and clips that you can purchase anywhere.  The placemats were also found at a local thrift store for less than three dollars, I'm sure.

The Blue Willow dinner ware was a gift from my mom years ago.  I'm glad they are no longer behind closed cabinet doors.   The crocks were purchased at antique stores and thrift stores.  Some where more expensive than others.

The buffet and hutch was a craigslist purchase and a great deal!  The two red chairs were given to us by Dustin's mom.  I painted them red.  Betty don't kill me after you read this.

When the look is complete I will post more pictures; That is if  I can stop breaking cameras.


Wednesday, July 6, 2011

Junkin' on a Wednesday

Well I decided to go thrift store shopping the morning, but got a little lost on the way to a new one.  Anxiously turning down unknown residential streets, in a not so sparkling neighborhood, I came upon a heap of items thrown out in the front of a house. There were some big ticket items like a ban saw, a table saw and some other extremely large wood working tools.  It would have taken two Incredible Hulks to lift and load those items so I focused on the stuff I could carry myself.
I found these ramps.  

This small cage needs to be cleaned out!


I also found this pen.  It's in great shape, but has a few unwelcome inhabitants; SPIDERS!!!  Luckily a neighbor came out to help me load it.  He said he was happy to see the pile get smaller. He also told me that the house was in foreclosure.  He never cared for his neighbors because they were "strange".  In fact, he said that in the large pen these strange people had kept a defanged rattle snake.  YIKES!!!! 

Overall, I am happy with these free items, but my husband may feel differently........

Sunday, April 24, 2011

Upcycled Bed Sheets Become Blinds and a Braided Rug

Last summer I purchased three king sized, white, flat bed sheets for two dollars each.  That's a bargain especially considering the prices of new fabric these days!  I thought I could use the sheets in various sewing projects. 
I was making a set of blinds for my dining room and needed a white backing fabric.  The sheets worked perfectly, or half of one sheet worked perfectly. The blinds were super easy to make.  I just cut the inner and outer fabric pieces to size, sewed them together, sewed two ribbon ties for each blind and sewed a pocked for the tension rod.  I found the tension rods at the Thrift Center for $1.99 each.  Not bad considering they are $6 brand new.  The black and white fabric was given to me by my very generous mother-in-law.  In the future I plan on using sheets for the decorative fabric as well.  

The total cost of these blinds was about $5 altogether!

There is no fancy dancy system to lower and raise these blinds.  I simply roll them up to the desired length and tie them up with the ribbon.  It works just fine.

One up, one down :)
Both up, the usual position.
The color scheme for my dining room was to be black and white that way the accent colors could be changed with the seasons.  I had the blinds made so the next order of business was a rug.  Well my dining table is a small, round, black table with four black chairs.  I decided that a round rug would be really cute in the small space, so I started pricing rugs. YIKES!!! Rugs are expensive. 
I researched the web for easy rug ideas and found a tremendous amount of information and inspiration.  I decided to make a braided rug out of the remaining sheets using  this tutorial from craftpassion.com. Check it out if your interested.  It is much more informative than this post :)  I ripped the sheets into two and a half inch strip that ran the lenght of the sheet.  Then I braided all the pieces together.  I ended up with a small, heavy bundle of braided sheet. 
The next step was to sew the braids into a circular rug. I started sewing the braids together by hand, but in the middle of a Florida summer that is a HOT job, so I used my machine for this and I doubt it will ever forgive me :)  My shoulders were also very upset.  The bigger the rug gets the heavier and more cumbersome it becomes. 

I broke the sewing up by doing just a little bit each day. 

The rug is not finished because it does not cover all the floor space under the table. 

It has been a long process because I was hired for a very demanding teaching job while working on this project and it was put on the back burner for months.  I hope to finish it this summer.  I need at least two more sheets to finish the rug.  In the end I will have spent maybe ten dollars on the whole project but a whole lot of time.  This doesn't bother me because I am more than happy to have more time than money :)