Sunday, June 27, 2010

Baby Shower Hanging Balls


A very dear cousin,Tosha,  is having a precious baby boy later this year, and her sister Holly, who is hosting the baby shower and who is also a very dear cousin,  asked me to help with the decorations.  Yay!! What fun to be able to create with an actual purpose instead of just creating for creation's sake.  As soon as she asked, the paper lanterns that I made for a previous post popped into my head.  
Her baby shower colors are blue and brown, so those were the colors used for the lanterns.  I decided to use brown for the lantern body and blue die cut flowers for the color punch.  !!!POW!!!

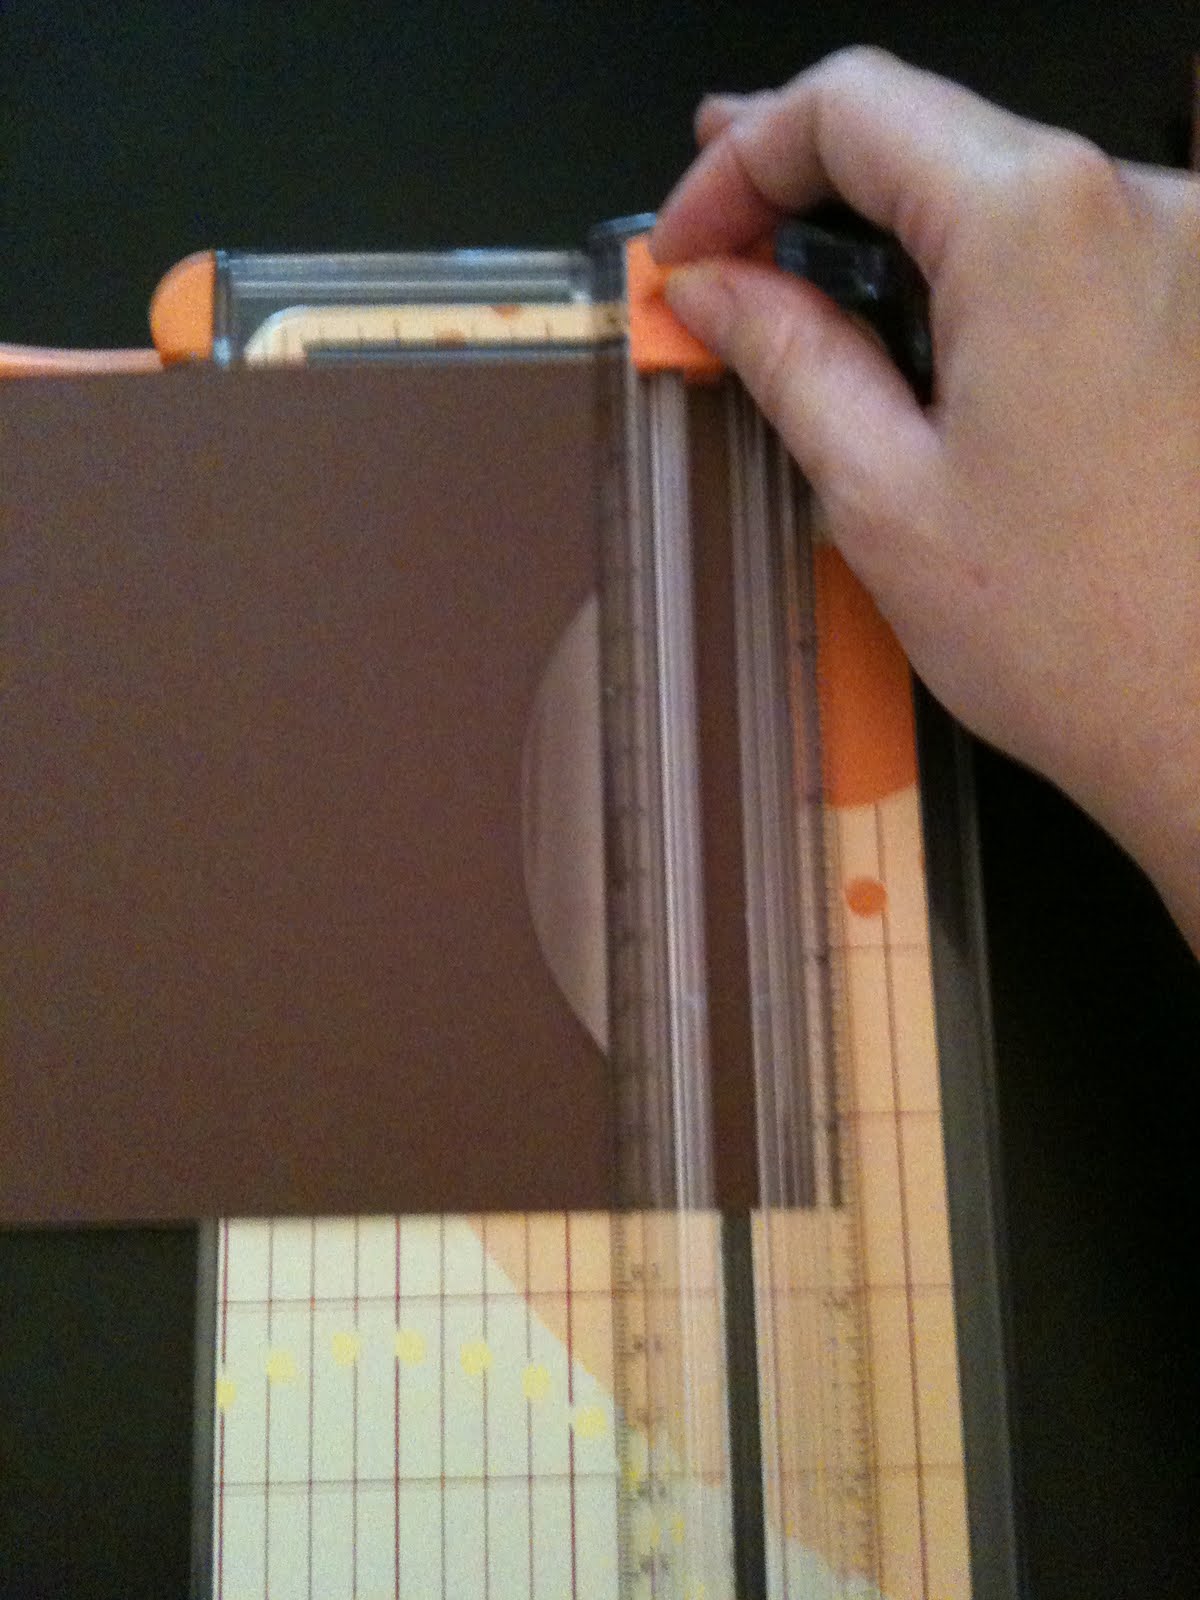
The first few steps in this process are rather boring.  Cut several 8.5" x 11" sheets of card stock paper in half and then cut as many 8.5"x1/2" strips out of each halved piece as you can.


Because the flower die is small the blue card stock paper had to be cut in the same manner. I used 6 pieces of brown card stock and only 2 pieces of blue.  All total I made 13 lanterns.
Punching paper flowers is the most time consuming part of this process, but it's fun so no matter.
Lots of strips and flowers....and this was not all of them...

Okay, so some steps were left out, but if you refer to the previous post on paper lanterns, you will get a better understanding of these steps.  Basically, you punch holes at the end of every strip, place 11 strips together aligning the holes.   Next just put a brad though each hole in order to hold the strips together a start pulling the strips around starting at the bottom of the stack.
At first they will look strange; just keep pulling them around and shape them up once your finished.
Next, use some double stick tape, glue, or Zots (that's what I used and they are fantastic) to apply the flowers onto the lanterns and your nearly finished.
Since I'm not sure how my cousin Holly wants to use these, I put ribbon under 1 strip and tie it in a knot at the end to make a ribbon loop for hanging.  If she does not want to hang them, we can just cut the ribbon off. 
I took several pictures because I could not get them to look as cute in the pictures as they are in person.
In person, they look good enough to eat!
These are just a few.   All of them would not fit in the picture.  (I'm still using my iPhone's camera.)   I hope Holly and Tosha like them!!  For a really good tutorial on how to make the basic paper lantern/balls/ornaments visit
1.
Pin It

Wednesday, June 23, 2010

More Phone Socks

I was really excited to try to make more phone socks today.  I had lots of apple fabric left over from the shirt.  I realized that the socks really didn't require any closures because they are so snug on the phone that the phone will only come out if it is tugged.  I also decided to forgo the wrist band.  It was good in theory but not in application, at least not without a little tweaking.  It only took me an hour or so to complete seven phone socks.
In fact after cutting the fabric, the thing that took the longest was pinning under the top edge.  Sewing took less than 20 minutes from start to finish for all of them.
Two are special because they have pockets.  That is just how the fabric was cut.  There was a large pocket on the original shirt and I incorporated parts of it in the phone socks.
Here's the first one with a pocket.  My husband's phone is filling in as sock model :)
This pocket is great for earphones.  I'm not sure what else would fit in there, but it's not big enough for credit cards.
Here is the second one with a pocket.  Notice on this one that the apples are horizontal instead of vertical.  This was necessary to form the pocket.  Luckily this one is large enough for licences or credit cards. It is also good for earphones.
I really like the ones that don't have a pocket too!
They will definitely keep the iPhone, or any phone for that matter, from getting scratched in your purse.
This was so super easy.  If only I knew what to do with six iPhone socks?

I can only use one!!! Oh and the good news is that I still have enough fabric left to make at least three more!  Maybe, I'll make a lot of wallets and phone socks and rent a booth at the Riverside Arts Market....Maybe??
Pin It

Tuesday, June 22, 2010

iPhone Wrist Case

I drop things....expensive things...like iPhones.  I've dropped my iPhone more times than I will admit to my husband.  Making a Klutz proof case was tops on the list of "to dos". 
The makeshift pattern was created by tracing the iPhone box.  This allowed for a 3/8 in. seam allowance.
This really cool shirt was purchased especially because of the cute apple design.  It was a good choice for the case because it is jersey and doesn't require any lining. 
The sleeve seemed like the obvious choice.  Really it didn't end up saving me any time.  I thought I could use the cuff as a closure for the case, but it looked strange.
I cut out the pattern and extended it to include the cuff.  Wish I hadn't bothered.
Next, I decided to use a long piece of 1/2 in scrap to make an elastic band.
This was easier than expected.

I pinned wrong sides together making sure to attach the elastic band. Note to those who are interested, I had a hard time stuffing the elastic band in the tight pouch and keeping it away from the needle while sewing. I reached inside the pouch and pulled the elastic away from the action :)
I eventually cut the cuff off, turned the raw edge over and zig-zagged it under.  I am glad the shirt has a lot more material because, I am going to try a different design tomorrow.  The elastic band pulls the case a little too much.  I will try to remedy that in the next creation.  I think the band was too long, so just shortening it should do the trick!

Here's hoping for more success tomorrow!

Tuesday, June 8, 2010

How to Make Balloon Center Pieces for LESS

It's easy, inexpensive and lots of fun!
I gathered all the materials I needed and wanted.  These included the water balloons, of course, tissue paper, drinking straws, double sided tape, and yarn.  I went a little extravagant and included scrapbook paper and paper punches.  If you plan on making these just experiment with the different material you have around your house.  I nearly used bubble wrap and plastic bags instead of tissue paper, but I decided to stick with the original plan.


I purchased 100 water balloons for $1.00 at my neighborhood Dollar Tree.  I wanted to experiment making balloon table centerpieces using them.  I was not sure if they would be strong and sturdy enough to hold up during extensive handling, but with a total investment of a dollar, I figured I should just give it a shot!


The centerpiece requires the use of 8 balloons.  It always looks best when only two colors are used, but that is only an opinion!  I chose pink and green.  It is necessary to say that the balloons are very vibrant when flat.  When inflated they are more pastel. 

After you have your balloons, blow two up and tie them off, or rather together. 
You will do this with each pair of balloons.  You should have 4 pairs when finished.
The next step is to twist 2 pair of balloons together.  It is important to wrap the balloon pairs around each other at the center point, making sure the colors are alternated when finished.
You will end up with 2 sets of quads :) like this.  The next step is to cut about 2 feet of yarn or ribbon or fishing string; whatever you have. You will use this to tie the 2 sets of quads together. 
I had yarn, so I used it! The next few steps are very important.
First, wrap the yarn under the bottom center of 1 quad, then place the 2nd quad on top(slightly twist the top quad so that it is not directly on top of the bottom balloon), drawing the yarn around its center as well and pull the yarn up tight while holding the balloons down with slight pressure.
Secure the 2 quads together by making a knot with the yarn.

Wrap the warn around a top and bottom set of balloons staying close to the center.  Do this with each top and bottom pair until the yarn is all used up. 

Your centerpiece should look something like this. Now to make some embellishments.
Here is where you will use your paper punch, straws, double sided tape and scrapbook paper.  Remember the paper punch is optional.  You can just cut shapes using scissors.
Only a very small piece of scrapbook paper is needed.

Punch out or cut out 4 shapes.

Wrap the double sided tape around the tip of the straw and put a piece at the top of your shape.
Place the second shape directly behind the first piece.

Carefully place your straws in between the balloons and adjust them to sit where you would like.
The next step is to cut up the tissue paper to stick in between the balloons.  You will need 2 sheets of tissue paper.  Cut 16-6x8 inch rectangles.  Really you can cut any size you like.  It is not necessary to be exact.
You will use 2 pieces of tissue together like this:

Next, just pinch the center and lightly crumble the tissue to give it some texture.
You will place the pointed end near the center of the centerpiece between 2 balloons.  Like so:
Do this all the way around.  Next, you will place tissue under each top balloon.  It is done the same way you place a diaper under a baby's bottom. Lift up the top balloon and put the point of the tissue paper near the center.  Do this all the way around and you are done.  Enjoy your centerpiece. 
I made a couple others just for fun.


So for $1.00 and some things around your house you could potentially make 12 beautiful centerpieces.  I bought an assorted variety of water balloons, but Dollar Tree sells them by individual colors as well. 
I think that water balloons will work as centerpieces, but if you want to make them a day or two in advance, I recommend getting 5 inch balloons from your local PARTYLAND!  Party City does not carry them, or at least my neighborhood Party City did not.  Also, if you plan on making more than three or four, I suggest you get a hand pump.  PARTYLAND also carries these, and they are no more than a couple of bucks.........
Try Wal-Mart as well. 
Pin It